Weekend Modders Guide to RGH3 Xbox 360 Falcon and Jasper Motherboard Consoles!
Required supplies:
- A way to read/write the nand. (Nand-X, JR Programmer, Matrix SPI Flasher, Squirt Slave Programmer, X-Flasher 360, Super Nand Flasher, PicoFlasher, or even a homemade LPT cable!)
- A 22K Ohm resistor and a 1N4148 Diode
- Some 28 or 30 gauge AWG wire (I like this ribbon cable made of 28AWG wire that can be separated and cut to length)
- T8 and a T10 Torx screwdriver for all the screws in the console.
- Standard Soldering supplies: A variable temperature soldering iron, some solder (I like 60/40 rosin core Kester), fiberglass scratch pen, some flux paste and a very sharp set of tweezers or an exacto knife.
Optional Supplies:
- You might want an X-Clamp removal tool to make opening the console easier.
It's been suggested to me that the X-clamp remover should be in the "required" supplies. For sure the X-Clamp can be removed without them, but the risk of damaging your board is very high if you're not very careful. You might want to check out this video clip of using the X-Clamp removal tool properly to see what you are up against.
- Strongly reccommend replacing the thermal paste with good stuff. Beware fake/low quality thermal paste!
My current (Feb 2022) suggestions:
- PicoFlasher (Raspberry Pi Pico cost just $4, then load Picoflasher firmware as described here)
Guide for RGH3 Falcon/Jasper motherboards:
1. Have a Falcon or Jasper motherboard console.
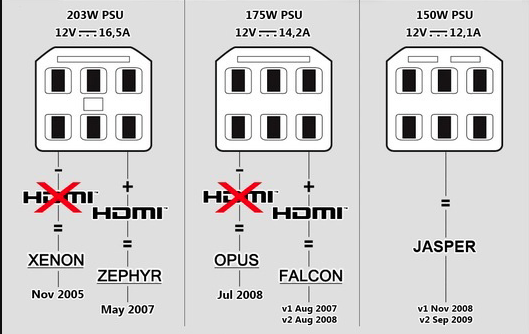
Falcon and Jasper consoles can easily be identified as the phat models that have HDMI and by examining their power socket. Refer to the below image:
2. Open up your console and break it down all the way to the motherboard. (Lots of guides on youtube for opening your console.)
You need a T8 and a T10 Torx screwdriver for all the screws in the console. You will need to remove both heatsinks, which means removing the X-clamps on the back. You might want an X-Clamp removal tool, and some replacement thermal paste. The stuff on the console will be old and dried up so I strongly recommend putting fresh thermal paste.
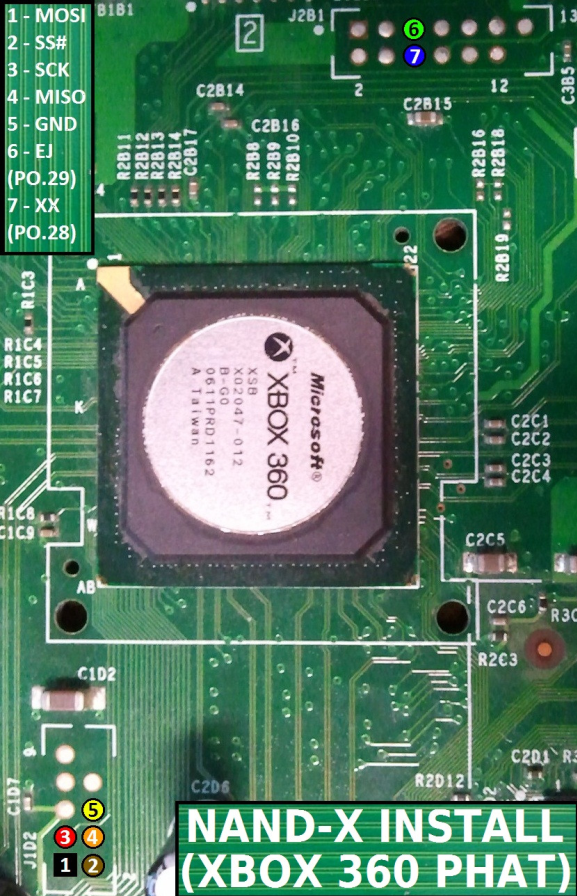
3. Solder in a Nand reading/writing programmer.
There are myriad options for programmers: Nand-X, JR Programmer, Matrix SPI Flasher, Squirt Slave Programmer, X-Flasher 360, Super Nand Flasher, PicoFlasher, or even a homemade LPT cable!
If you're only going to do this one mod, my favorite device right now is the Raspberry Pi Pico set up as a PicoFlasher, you can snag the Pico off Amazon for just $8, but the best deal is at a MicroCenter or other major electronics reseller where they are just $4!
No matter what device you decide on to read/write your nand they are likely to use the color coding in the diagram below as it's essentially a standard now, shared by the Nand-X, JR-Programmer, X-Flasher. All the programmers will use the same point even if they don't respect the color coding.
4. Dump (read) the nand twice and ensure both copies you took match.
Do this using Jrunner software. Get that from this RealModScene thread
5. Install the CPU_PLL_BYPASS ->22kohm -> DB1F1 connection as shown in the image below.
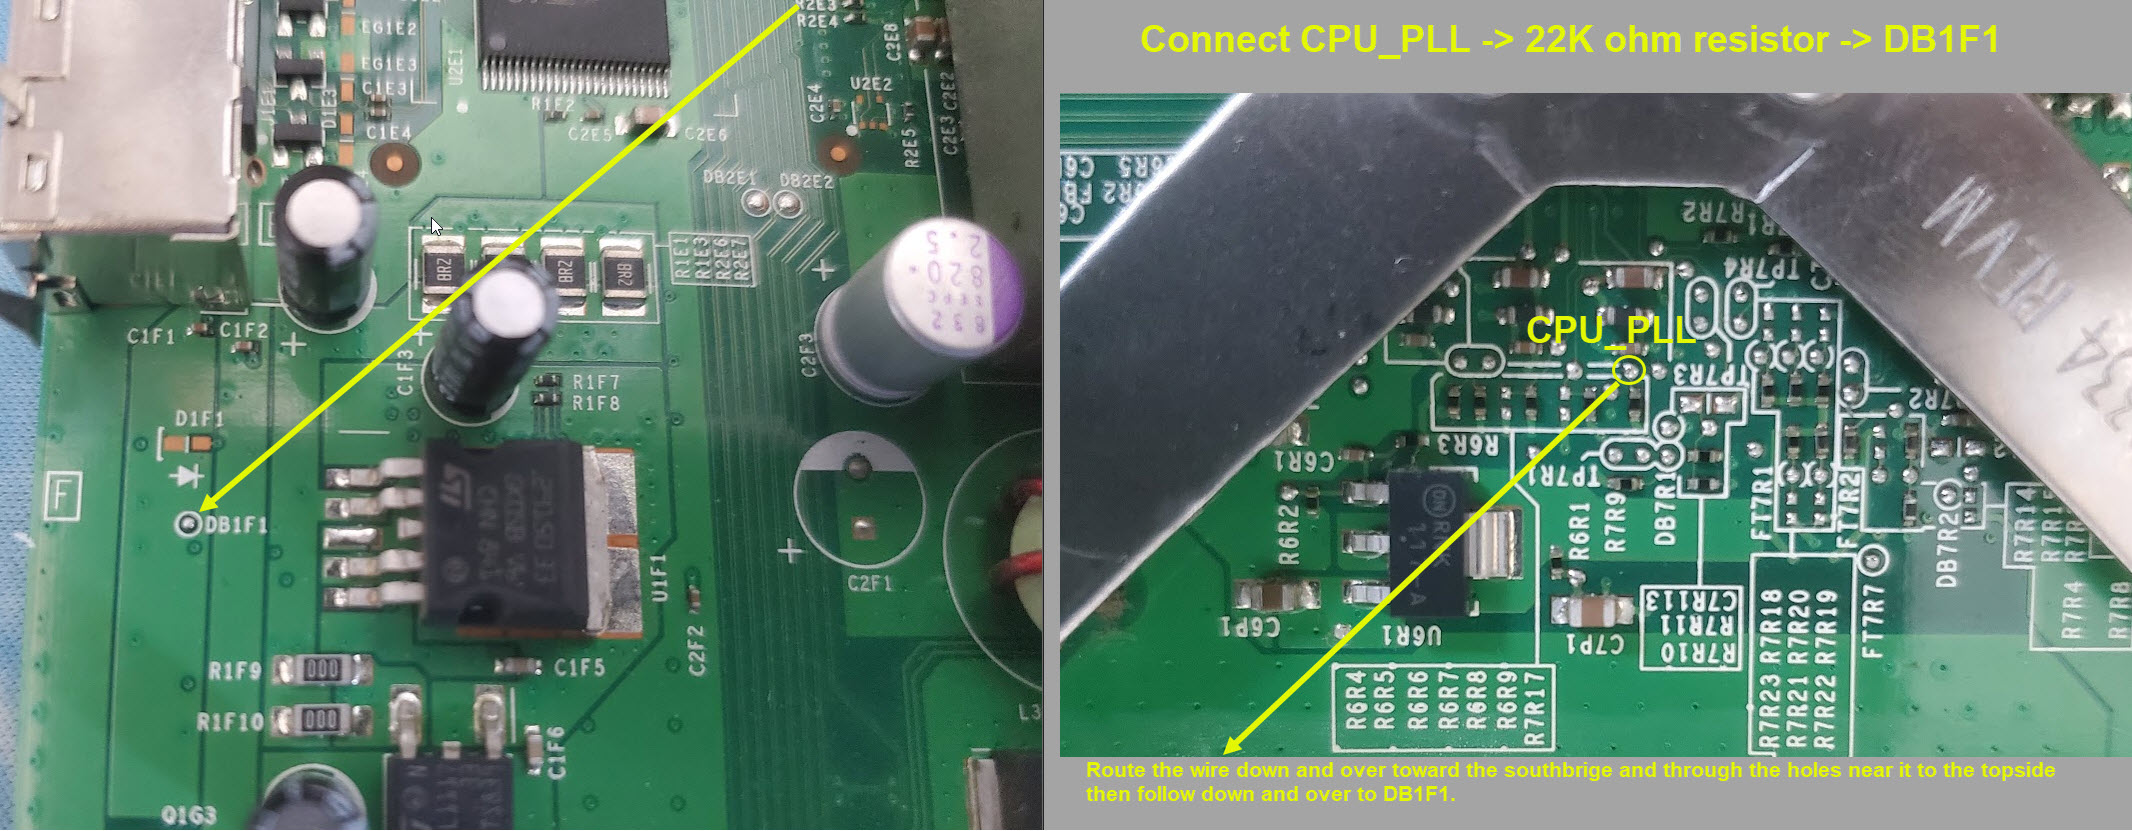
If you are having issues with figuring out wire routing, the original image provided in the RGH3 pack released by 15432 is helpful.
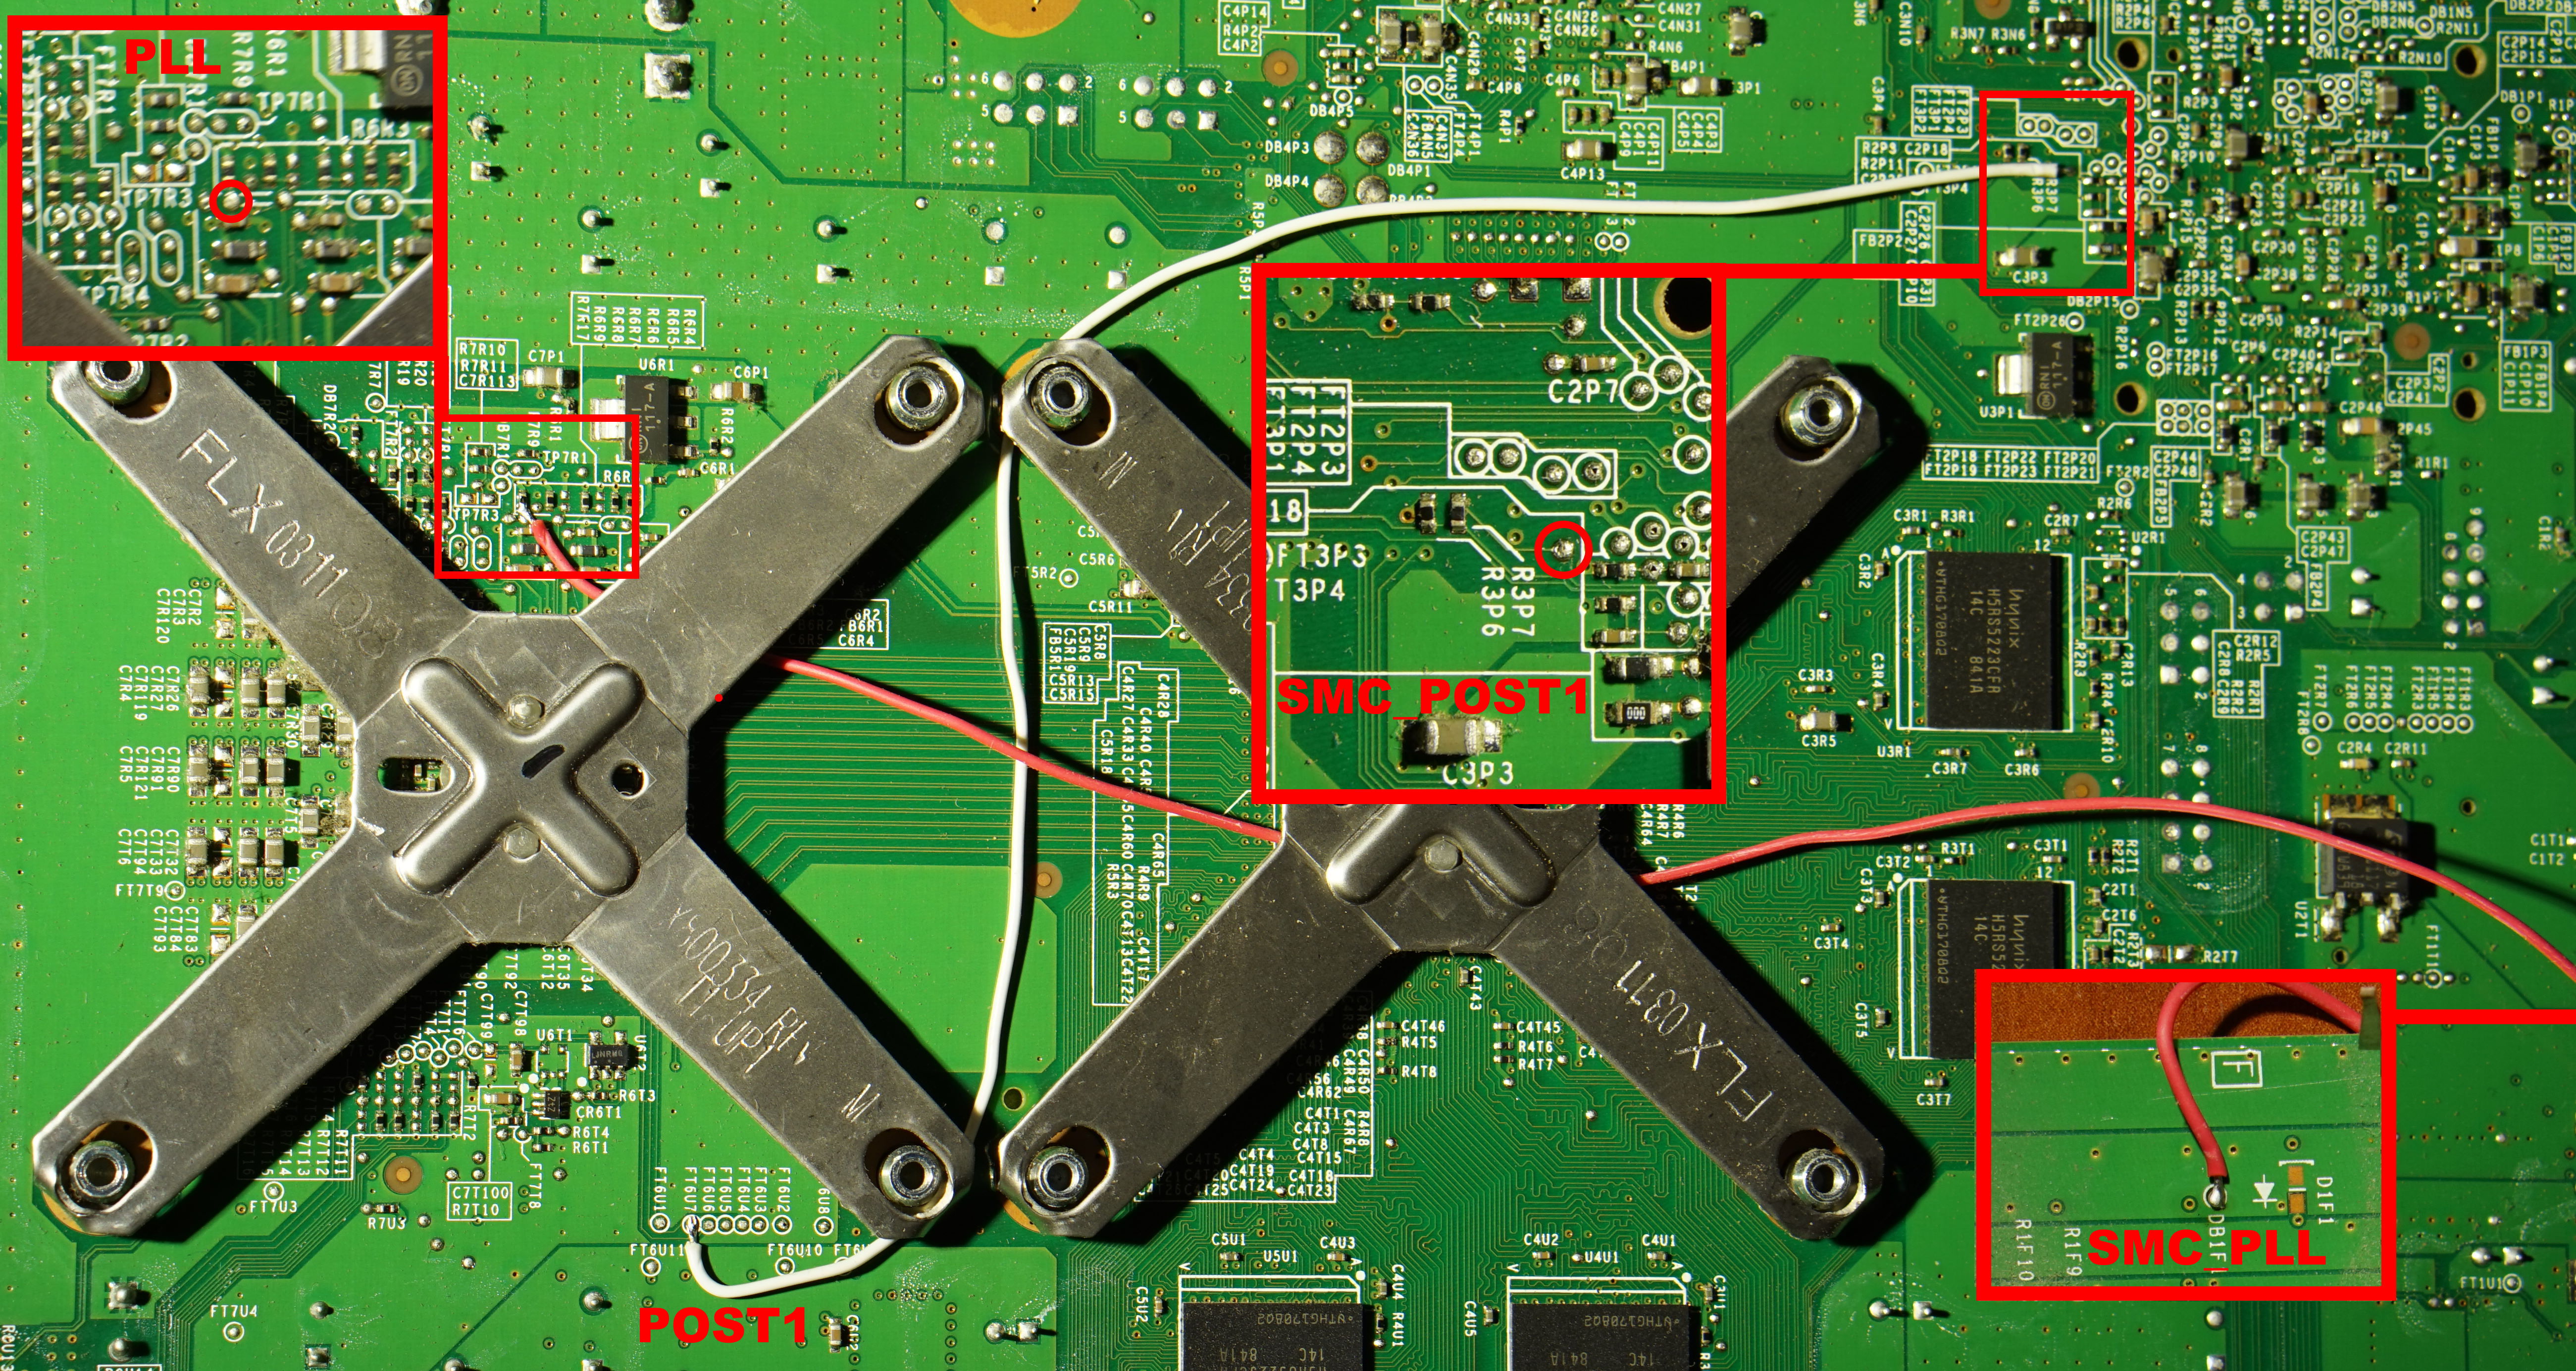
6. Install the POST_BUS_1 -> 1N4148 diode -> R3P7 connection as shown in the image below.
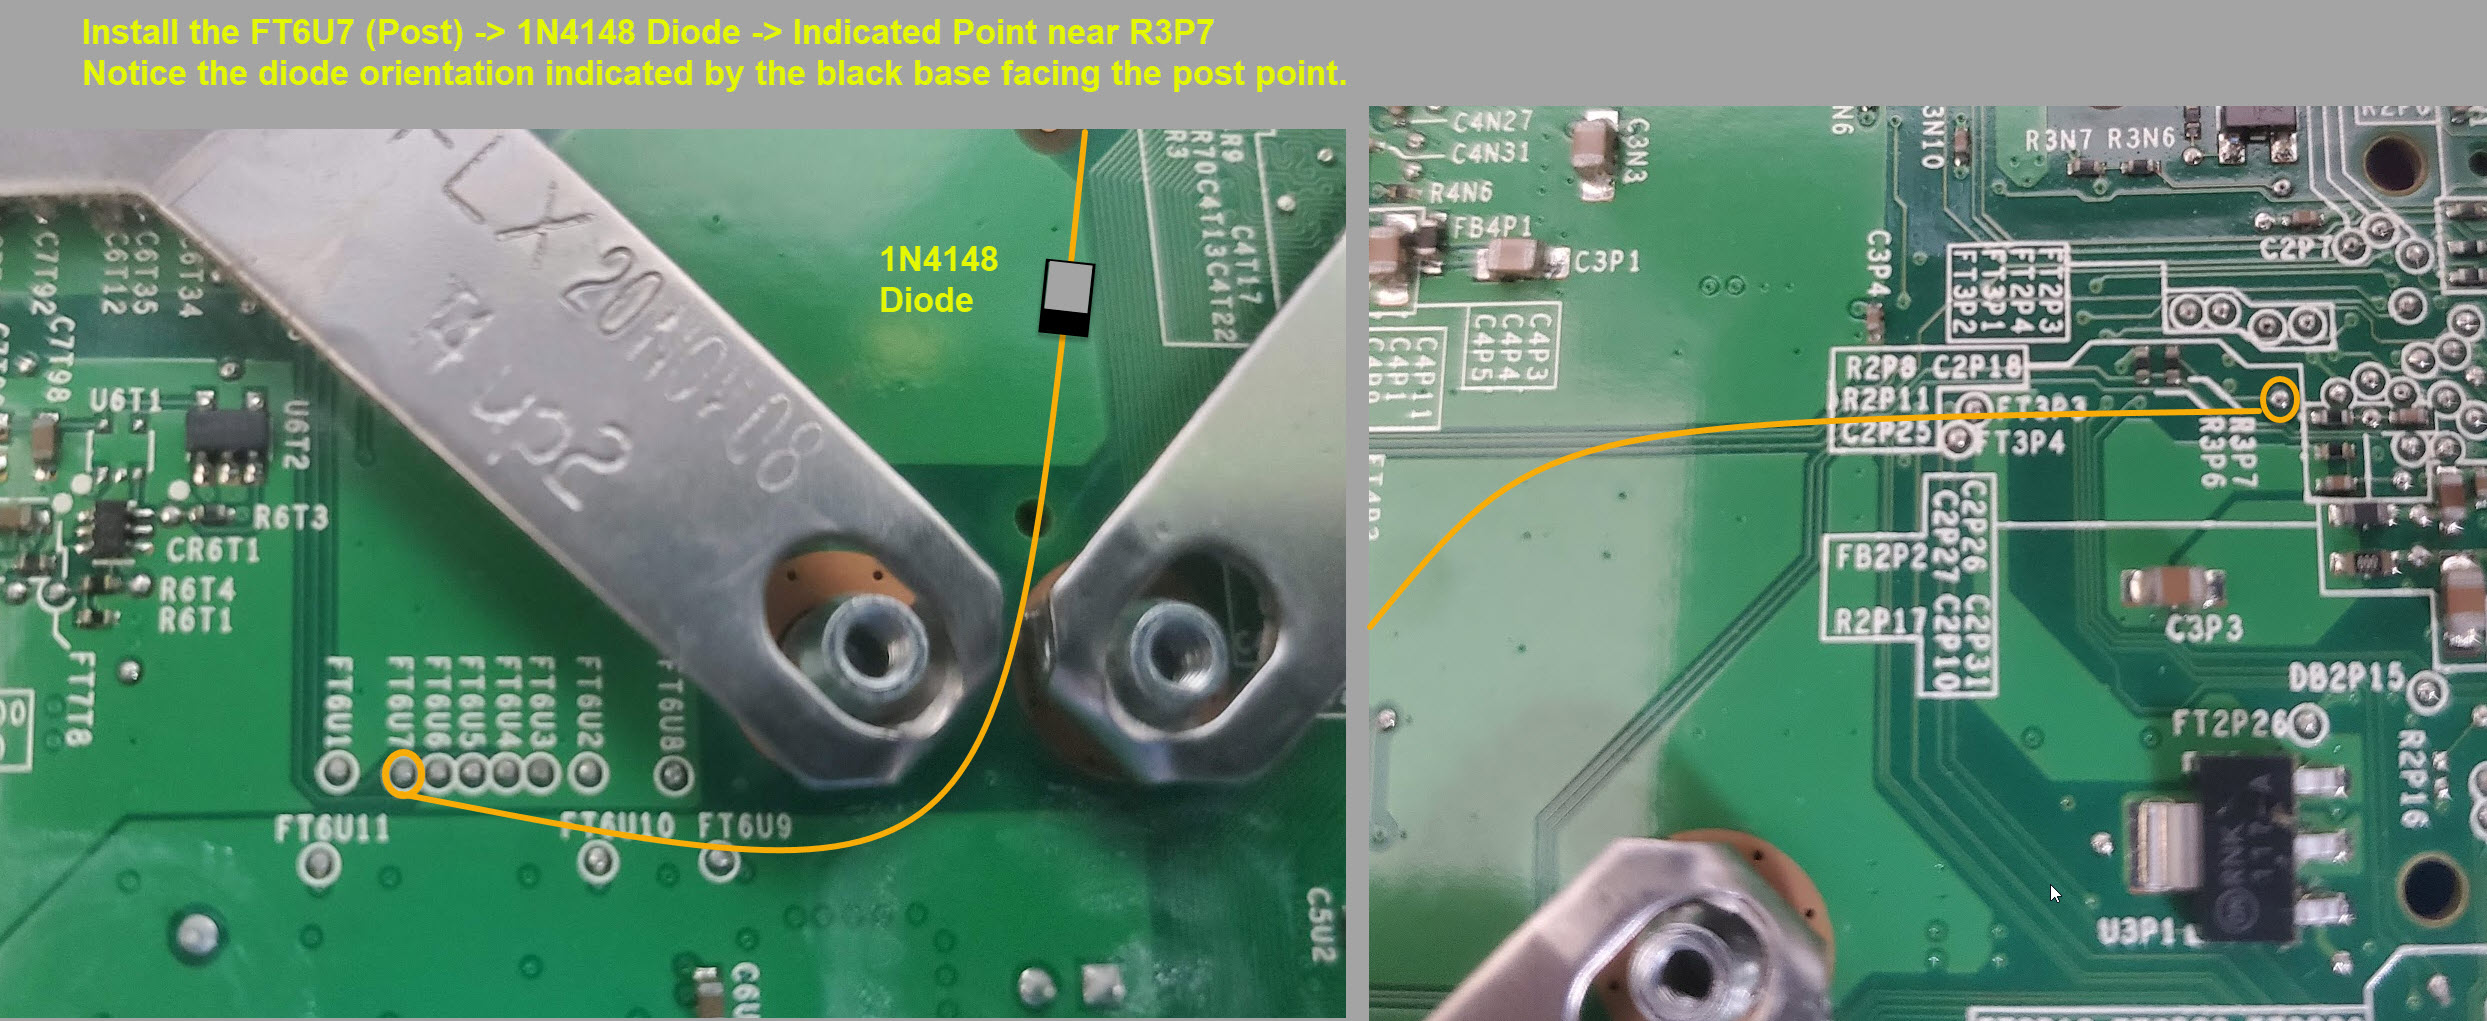
If you are having issues with figuring out wire routing, the original image provided in the RGH3 pack released by 15432 is helpful.
7. Write the RGH3 precompiled ECC file and boot Xell to get your CPU key
Current Jrunner builds support RGH3 just fine, make sure you have RGH3 selected when you "build ECC" so you make sure you generate the right one.
8. Enter your CPU key into Jrunner, build a full RGH3 nand image, write that newly created nand image (updflash.bin) to the console.
When you plug your CPU key into Jrunner, the "KV Info" sub tab on the right should populate with all the decrypted nand data like your consoles serial number. Make sure you have the right options selected for RGH3 when you 'create xebuild image'.
9. Boot up and enjoy your RGH'd Console!
Now you can install XexMenu, FreeStyle Dash, Aurora Dash, a bunch of different emulators - and yes, even the football revamped game.
Video of RGH3 Install on a Jasper:
Video coming!
Video of RGH3 Install on a Falcon:
Video coming!